
27 Aug 2019
Chef
What is Chef
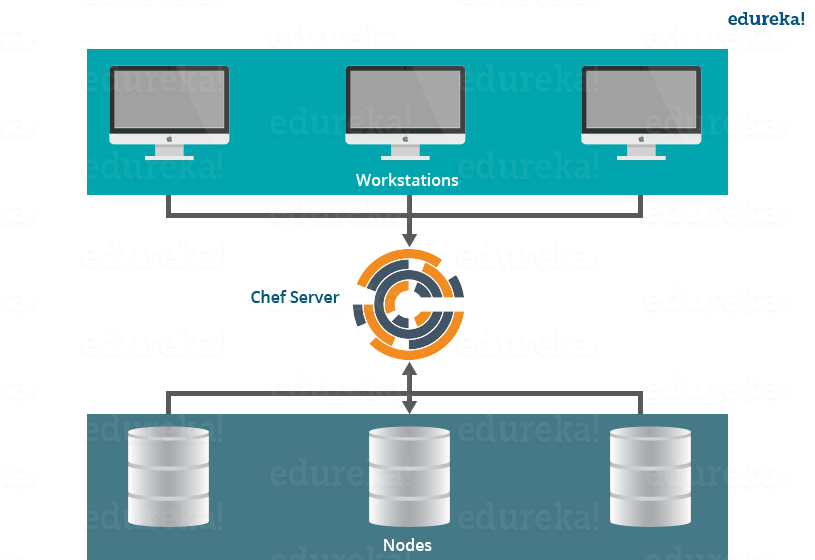
Chef 是一个可以提供代码即基础设施的的自动化工具。C/S架构:
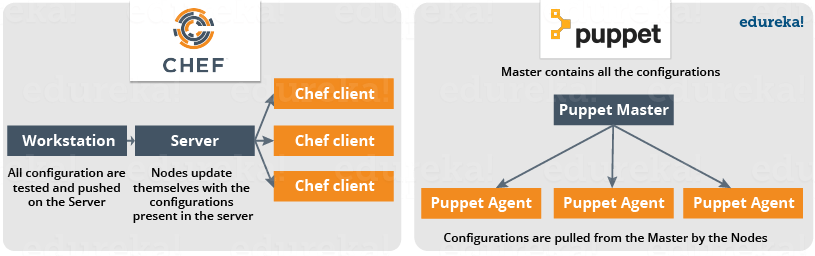
nodes可以动态更新server端的配置,pull configuration,不需要在server端执行push configuration到node的命令,所有的node都可以自动更新server端的配置。像Chef 和 Puppet都是pull configuration。
与之相对的 push configuration,ansible。
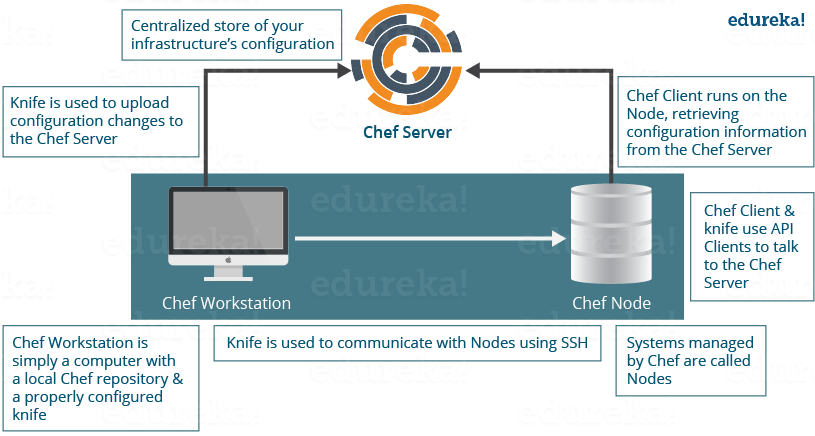
Chef 有三大组件:
-
Workstation
- 用于写 Cookbooks 和 Recipes, 这些会被push到 central Chef Server
- 管理 central Chef Server 的节点。
Workstations 有两大组件:
- Knife utility
- A local Chef repository
-
Server
类似于一个配置数据的hub. Chef Server 存储 Cookbooks, 应用到Nodes的 policies, 和描述注册节点的元数据(被Chef-Client管理).
Nodes 通过 Chef-Client 去向 Chef Server 获取配置详情,比如 Recipes, Templates, and file distributions.
每个节点都安装有 Chef Client , 它会从 Chef Server pull down 配置文件.
-
Nodes
主要的组件就是Chef Client, 它主要有以下功能:
- 负责与 central Chef Server交互.
- 管理Node到 central Chef Server 的初始注册.
- 拉取 Cookbooks, 并 apply 到 Node 进行配置.
- 周期性轮训 central Chef Server 获取新的配置
Install Chef
Following are the steps to install Chef:
-
Install Chef DK (Development Kit) on Chef Workstation
 #wget https://packages.chef.io/stable/el/6/chefdk-1.0.3-1.el6.x86_64.rpm
 #rpm -ivh chefdk-1.0.3-1.el6.x86_64.rpm
Create a Recipe in the Workstation, you will see the file with this content:
 #mkdir chef-repo
 #cd chef-repo
 #vim edureka.rb , add :

 file '/etc/motd' do
 content 'Welcome to Chef'
 end

 #chef-apply edureka.rb
Modifying Recipe file to install httpd package, you can go to localhost through Chrome:
#vim edureka.rb package 'httpd' service 'httpd' do action [:enable, :start] end file '/var/www/html/index.html' do content 'Welcome to Apache in Chef' end #chef-apply edureka.rb -
Create a Recipe or a Cookbook in Workstation
 #cd chef-repo
 #mkdir cookbooks
 #cd cookbooks
 #chef generate cookbook httpd_deploy
 #cd httpd_deploy
 #tree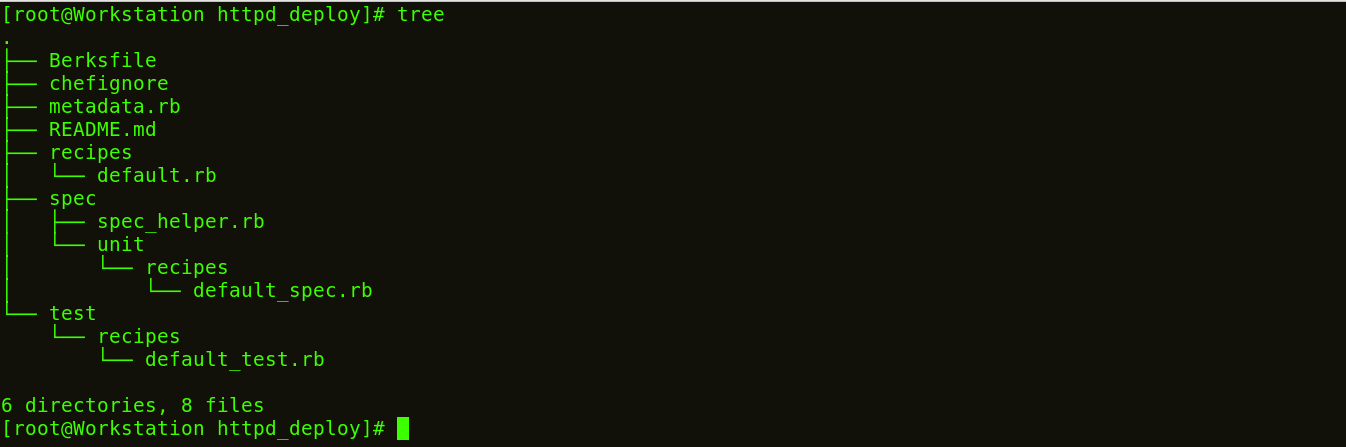
Create a Template file:
#chef generate template httpd_deploy index.html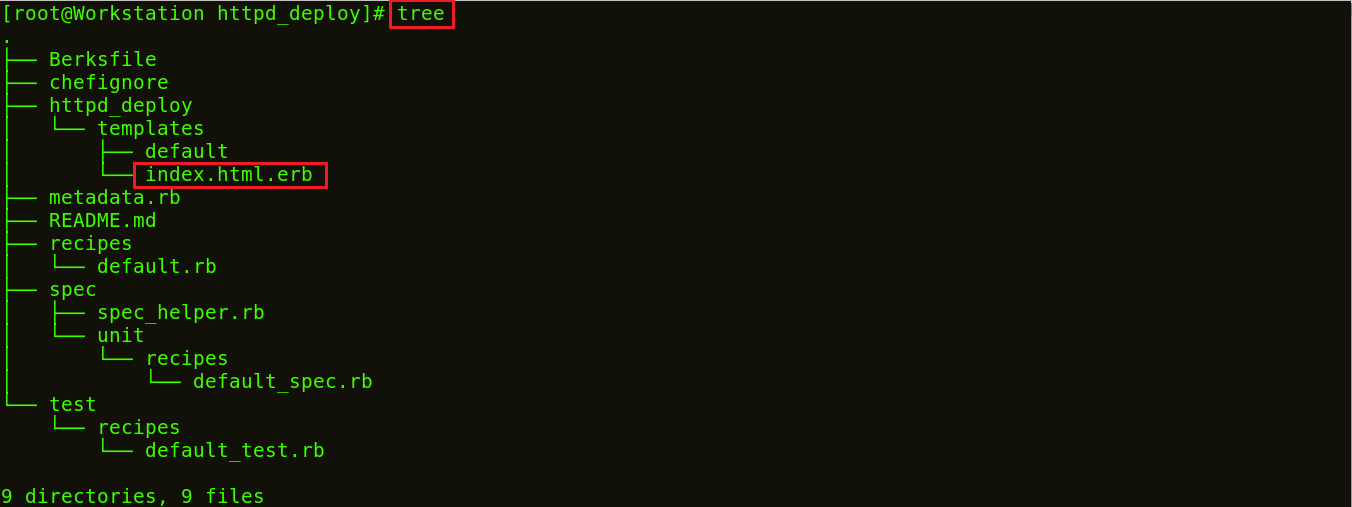
 #cd /root/chef-repo/cookbook/httpd_deploy/templates
 #vim index.html.erb
 Welcome to Chef Apache Deployment
Create a Recipe with this template:
#cd /root/chef-repo/cookbooks/httpd_deploy/recipes #vim default.rb package 'httpd' service 'httpd' do action [:enable, :start] end template '/var/www/html/index.html' do source 'index.html.erb' end #cd /root/chef-repo #chef-client --local-mode --runlist 'recipe[httpd_deploy]' -
Setup a Chef Server
hosted version of Chef Server on the cloud
download starter kit #unzip chef-starter.zip #mv starter /root/chef-repo/cookbooks -
download a Cookbook from Chef Supermarket in Workstation
#cd chef-repo #knife cookbook site download learn_chef_httpd #tar -xvf learn_chef_httpd-0.2.0.tar.gz #cd /root/chef-repo/learn_chef_httpd/recipes -
Upload a Cookbook on the Chef Server
#mv /root/chef-repo/learn_chef_httpd /root/chef-repo/cookbooks #cd /root/chef-repo/cookbooks #knife cookbook upload learn_chef_httpd -
Connect A Node To The Chef Server
// 192.168.56.102是一个node的IP #knife bootstrap 192.168.56.102 --ssh-user root --ssh-password edureka --node-name chefNode #Knife node list -
Deploy the Cookbook from the Server to the Node
 manage its Run list from the Chef Server
 node# chef-client
Chef Solo
当你只需要设置一台server的时候,使用chef server 和 chef client就太重了,这个时候我们就可以使用chef-solo。
local machine上面有这些文件:
deploy.sh     <--- run "./deploy.sh" on your laptop to deploy
install.sh    <--- this is run on the server to bootstrap and call chef-solo
solo.json     <--- chef configuration
solo.rb       <--- chef configuration
cookbooks/op/recipes/default.rb   <--- the most important file -- your
                                       server recipe goes here
deploy.sh
#!/bin/bash

# Usage: ./deploy.sh [host]

host="${1:-ubuntu@opinionatedprogrammer.com}"

# The host key might change when we instantiate a new VM, so
# we remove (-R) the old host key from known_hosts
ssh-keygen -R "${host#*@}" 2> /dev/null

tar cj . | ssh -o 'StrictHostKeyChecking no' "$host" '
sudo rm -rf ~/chef &&
mkdir ~/chef &&
cd ~/chef &&
tar xj &&
sudo bash install.sh'
Til next time,
at 09:42
